Understanding UIKit: CALayer Anchor Point
Understanding how the CALayer.anchorPoint property effects layout
All on screen elements (normally) on iOS are made of UIView's. They have a frame, which have an x and y origin, and a width and height size.
The frame is actually a derived property. It comes from combining the bounds, center and transform properties. If you apply a transform to scale a view up by 2 its frame will grow, but its bounds will remain the same size.
The bounds is the view's internal size, the frame is the external size.
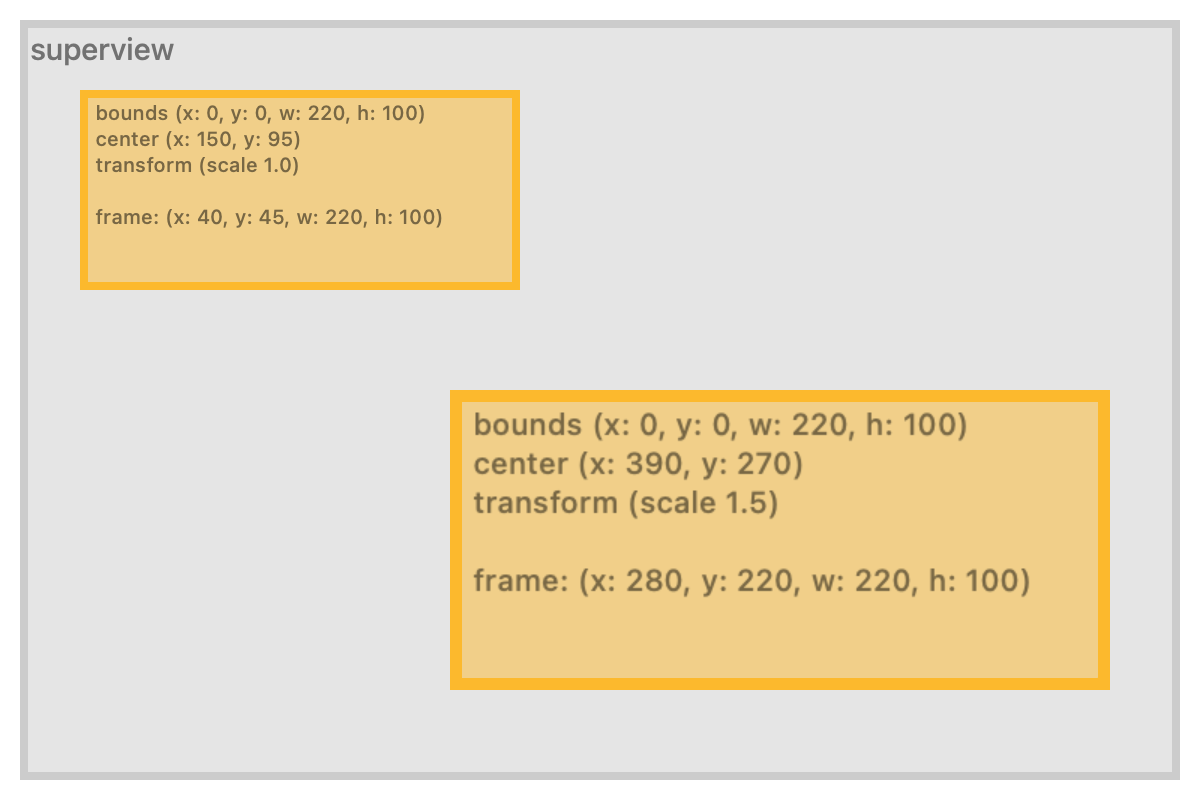
UIView Frame
You can see in this example, applying the scaling changes the frame, but not the bounds.
However, UIView's are actually a helper which adds touch and other event handling on top of the real on screen element. The real element which controls what appears on screen is the CALayer which backs each and every UIView.
CALayer's location on screen is controlled by very similar, but slightly different set of properties.
The bounds, for internal size.
The position, its location in its parent view.
The transform, which is a 3D transform now (not just a 2D one like UIView's transform property)
And finally the anchorPoint property.
CALayer anchorPoint
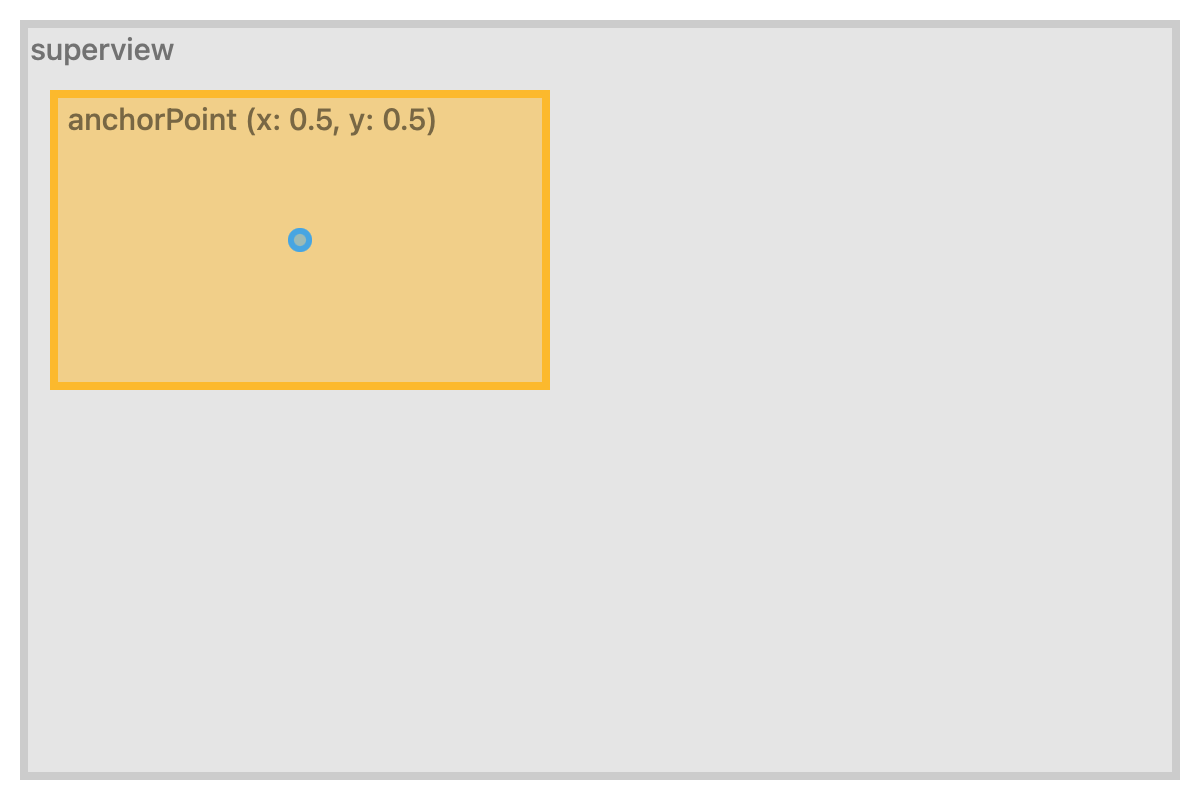
By default anchorPoint is (x: 0.5, y: 0.5). This is a relative value.
Instead of being a point value in the parent view/layer like position or bounds, this is relative to its width and height.
(x:0, y:0) is the top left corner.
(x:0.5, y:0.5) the middle of the view.
(x:1, y: 1) is the bottom right edge of the view.
The anchorPoint is the location inside the view/layer that the UIView.center or CALayer.position represents. Normally this defaults to the centre of the view.
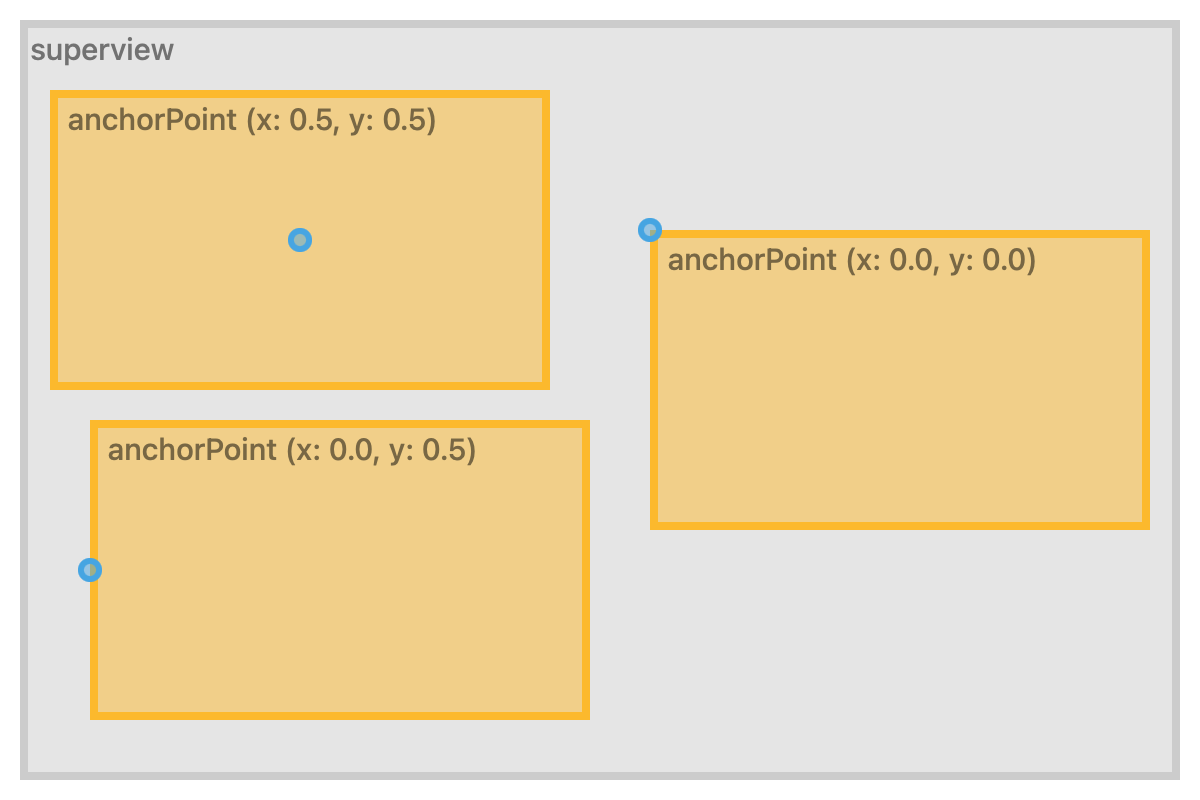
However, if you change the anchor point the entire layer shifts over based on this pivot point.
The official documentation puts it nicely.
All geometric manipulations to the view occur about the specified point. For example, applying a rotation transform to a layer with the default anchor point causes the layer to rotate around its center. Changing the anchor point to a different location would cause the layer to rotate around that new point.
This hints at one of the big reasons you might want to use the anchorPoint property. It allows you to easily control how other properties, such as the transform (rotation and scaling) are applied to the views.
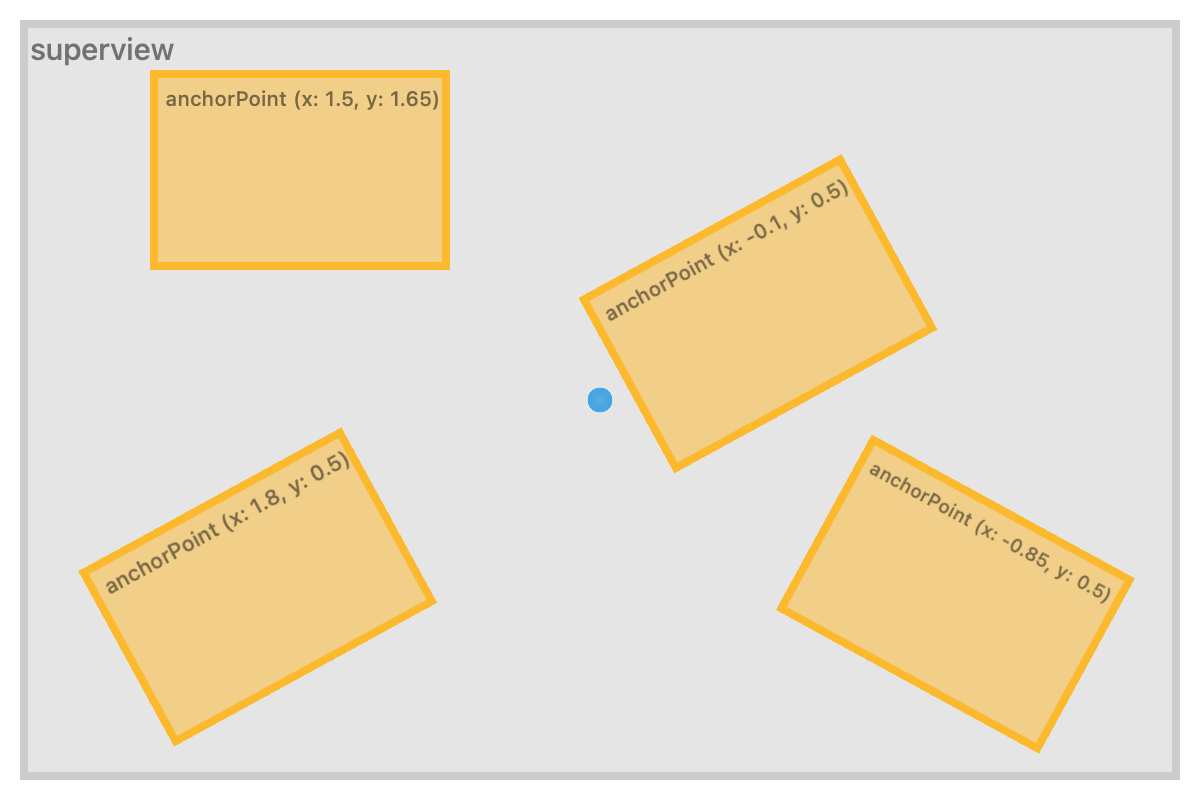
If we apply the same rotation to all the views from the above example you can see the different effects it has on each.

Outside the Box
All the examples above have the anchorPoint inside the view's bounds, as we would normally expect, with values between 0 and 1. However, there is nothing that requires that.
We can freely set values above, or below, that range.
An X value of 1 is the full width away from the left edge. So a value of 2 would be 2 full widths of the layer away from the left edge.
Similarly a value of -1 would be 1 full width away from the left edge of the layer.
All the examples below have the same centre point set, but different anchor points (and some rotation).
Although these examples use rotation, the same also applies to scaling. Scaling up or down a layer is done from the point of origin of its anchorPoint.
So if the anchorPoint is outside the bounds, when a layer is scaled up it will appear to expand away from the anchorPoint.