Create MP4 from UIImage's
Load frames from image files and encode an H.264 MP4 with typed Swift examples, source images, a timeline, and a playable video.
Load image files, draw their pixels into video frames, and write an H.264 MP4. The completion-handler version supports iOS 13+; the async/await version uses iOS 26+.

Frames → MP4
These ten 100 × 100-pixel images each contain a frame number and a bottom progress bar. At 2 fps, each image appears for 0.5 seconds, producing a five-second video.

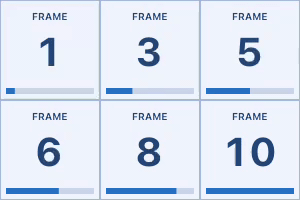
Play the MP4 · Download input PNGs
Complete exporters
The downloads include validation, error definitions, image-loading helpers, and export lifecycle management. Choose one complete file for your project.
1. Find the image files
Add the sample Frames folder to your app’s resources, preserving the folder in the bundle. Build the file URLs in playback order.
let imageURLs: [URL] = try (1...10).map({ (number: Int) throws -> URL in
    let name: String = String(format: "frame-%02d", number)

    guard let url: URL = Bundle.main.url(
        forResource: name,
        withExtension: "png",
        subdirectory: "Frames"
    )
    else {
        throw FrameVideoError.missingFrame(name)
    }
    return url
})
let width: Int = 100
let height: Int = 100
let framesPerSecond: Int32 = 2
2. Decode an image
ImageIO reads the file and applies its orientation. Limit the decoded size to the video’s dimensions.
let imageURL: URL = imageURLs[0]

let options: [CFString: Any] = [
    kCGImageSourceCreateThumbnailFromImageAlways: true,
    kCGImageSourceCreateThumbnailWithTransform: true,
    kCGImageSourceThumbnailMaxPixelSize: max(width, height)
]
guard let source: CGImageSource = CGImageSourceCreateWithURL(
    imageURL as CFURL,
    nil
), let image: CGImage = CGImageSourceCreateThumbnailAtIndex(
    source,
    0,
    options as CFDictionary
) else {
    throw FrameVideoError.unreadableImage(imageURL)
}
3. Prepare the pixels
Allocate a BGRA pixel buffer at the video’s output size. Every frame uses the same width and height.
let attributes: [CFString: Any] = [
    kCVPixelBufferCGImageCompatibilityKey: true,
    kCVPixelBufferCGBitmapContextCompatibilityKey: true
]
var allocatedBuffer: CVPixelBuffer? = nil

let creationResult: CVReturn = CVPixelBufferCreate(
    kCFAllocatorDefault,
    width,
    height,
    kCVPixelFormatType_32BGRA,
    attributes as CFDictionary,
    &allocatedBuffer
)
guard creationResult == kCVReturnSuccess,
      let buffer: CVPixelBuffer = allocatedBuffer else {
    throw FrameVideoError.cannotCreateBuffer(creationResult)
}
Lock the buffer before accessing its memory, and unlock it when drawing finishes.
let lockResult: CVReturn = CVPixelBufferLockBaseAddress(buffer, [])

guard lockResult == kCVReturnSuccess else {
    throw FrameVideoError.cannotLockBuffer(lockResult)
}
defer { CVPixelBufferUnlockBaseAddress(buffer, []) }

let bitmapInfo: UInt32 = CGBitmapInfo.byteOrder32Little.rawValue
    | CGImageAlphaInfo.premultipliedFirst.rawValue

guard let context: CGContext = CGContext(
    data: CVPixelBufferGetBaseAddress(buffer),
    width: width,
    height: height,
    bitsPerComponent: 8,
    bytesPerRow: CVPixelBufferGetBytesPerRow(buffer),
    space: CGColorSpace(name: CGColorSpace.sRGB)!,
    bitmapInfo: bitmapInfo
) else {
    throw FrameVideoError.cannotCreateContext
}
Fill the background with black, then fit the image into the frame while preserving its aspect ratio.
let bounds: CGRect = CGRect(x: 0, y: 0, width: width, height: height)
context.setFillColor(CGColor(gray: 0, alpha: 1))
context.fill(bounds)

let scale: CGFloat = min(
    CGFloat(width) / CGFloat(image.width),
    CGFloat(height) / CGFloat(image.height)
)
let drawnWidth: CGFloat = CGFloat(image.width) * scale
let drawnHeight: CGFloat = CGFloat(image.height) * scale
let imageRect: CGRect = CGRect(
    x: (CGFloat(width) - drawnWidth) / 2,
    y: (CGFloat(height) - drawnHeight) / 2,
    width: drawnWidth,
    height: drawnHeight
)
context.draw(image, in: imageRect)
The complete exporters package these steps into loadFrame(imageURL:maximumPixelSize:) and makePixelBuffer(image:width:height:).
4. Configure the video writer
Use H.264 inside an MP4 container. Choose positive even dimensions and a new output file URL.
let filename: String = "frames-\(UUID().uuidString).mp4"
let outputURL: URL = FileManager.default.temporaryDirectory.appendingPathComponent(filename)

let settings: [String: Any] = [
    AVVideoCodecKey: AVVideoCodecType.h264,
    AVVideoWidthKey: width,
    AVVideoHeightKey: height
]

let writer: AVAssetWriter = try AVAssetWriter(
    outputURL: outputURL,
    fileType: .mp4
)

let input: AVAssetWriterInput = AVAssetWriterInput(
    mediaType: .video,
    outputSettings: settings
)

input.expectsMediaDataInRealTime = false
5. Append frames at their timestamps
At 2 fps, frames start at 0, 0.5, 1.0 … 4.5 seconds. Calculate each timestamp from its index and the frame rate.

Completion handlers
Attach a pixel-buffer adaptor to the input, add the input to the writer, and start the writing session.
let adaptor: AVAssetWriterInputPixelBufferAdaptor = AVAssetWriterInputPixelBufferAdaptor(
    assetWriterInput: input,
    sourcePixelBufferAttributes: nil
)
writer.add(input)

guard writer.startWriting() else {
    throw writer.error ?? FrameVideoError.encodingFailed
}
writer.startSession(atSourceTime: .zero)
Register a callback on the exporter’s serial queue. The full exporter keeps the frame index on that queue between callbacks.
self.input.requestMediaDataWhenReady(
    on: self.queue,
    using: { [weak self] () -> Void in
        self?.appendReadyFrames()
    }
)
Inside the callback, append while the input is ready. Return when it becomes busy; AVFoundation calls the readiness callback again when it can accept more frames. Apple’s readiness callback
while self.input.isReadyForMoreMediaData && (self.index < self.imageURLs.count) {
    let image: CGImage = try loadFrame(
        imageURL: self.imageURLs[self.index],
        maximumPixelSize: max(self.width, self.height)
    )
    let buffer: CVPixelBuffer = try makePixelBuffer(
        image: image,
        width: self.width,
        height: self.height
    )
    let timestamp: CMTime = CMTime(
        value: Int64(self.index),
        timescale: self.framesPerSecond
    )
    guard self.adaptor.append(buffer, withPresentationTime: timestamp) else {
        throw self.writer.error ?? FrameVideoError.encodingFailed
    }

    self.index += 1
}
Async/await
Create a pixel-buffer receiver, which attaches the input to the writer. Then start the writing session.
let receiver: AVAssetWriterInput.PixelBufferReceiver = writer.inputPixelBufferReceiver(
    for: input,
    pixelBufferAttributes: nil
)
try writer.start()
writer.startSession(atSourceTime: .zero)
The receiver’s append(_:with:) waits until it can accept the next frame. Keep the loop inside the async export function. Apple’s async append API
var index: Int = 0

while index < imageURLs.count {
    try Task.checkCancellation()

    let image: CGImage = try loadFrame(
        imageURL: imageURLs[index],
        maximumPixelSize: max(width, height)
    )
    let buffer: CVPixelBuffer = try makePixelBuffer(
        image: image,
        width: width,
        height: height
    )

    let timestamp: CMTime = CMTime(value: Int64(index), timescale: framesPerSecond)
    let readOnlyBuffer: CVReadOnlyPixelBuffer = CVReadOnlyPixelBuffer(unsafeBuffer: buffer)

    try await receiver.append(readOnlyBuffer, with: timestamp)

    index += 1
}
6. Finish the MP4
End the session at frame count ÷ frame rate. Ten frames at 2 fps end at 5 seconds, giving the last frame its full half-second duration.
Completion handlers
After appending the final frame, mark the input as finished. Deliver the output URL after finishWriting(completionHandler:) reports completion.
let endTime: CMTime = CMTime(
    value: Int64(self.imageURLs.count),
    timescale: self.framesPerSecond
)

self.writer.endSession(atSourceTime: endTime)

self.input.markAsFinished()

self.writer.finishWriting(completionHandler: { () -> Void in
    self.queue.async(execute: { () -> Void in
        if self.writer.status == .completed {
            self.complete(result: .success(self.outputURL))
        }
        else {
            self.complete(result: .failure(self.writer.error ?? FrameVideoError.encodingFailed))
        }
    })
})
Async/await
Finish the receiver, await finalization, and check the writer’s status before returning the output URL.
let endTime: CMTime = CMTime(
    value: Int64(imageURLs.count),
    timescale: framesPerSecond
)

writer.endSession(atSourceTime: endTime)
receiver.finish()

await writer.finishWriting()

guard writer.status == .completed else {
    throw writer.error ?? FrameVideoError.encodingFailed
}
7. Use the complete exporter
Use the file URLs, dimensions, frame rate, and output URL prepared above. Call the implementation from your selected Swift download.
Completion handlers
Setup errors throw from export. The completion handler receives the encoding result on the supplied queue.
try MP4CallbackExporter.export(
    imageURLs: imageURLs,
    outputURL: outputURL,
    width: width,
    height: height,
    framesPerSecond: framesPerSecond,
    completionQueue: .main,
    completion: { (result: Result<URL, Error>) -> Void in
        do {
            let videoURL: URL = try result.get()
            print(videoURL.path)
        } catch {
            print(error.localizedDescription)
        }
    }
)
Async/await
Call from an async context and use the URL after the export returns.
try await exportMP4(
    imageURLs: imageURLs,
    outputURL: outputURL,
    width: width,
    height: height,
    framesPerSecond: framesPerSecond
)
print(outputURL.path)
MP4CallbackExporter.swift · MP4AsyncExporter.swift · Input frames