External Only Shadows with a Container View
A reusable UIView wrapper for drawing an outer shadow around clipped content without masking the content itself
In the previous post External Only Shadow on UIView I covered one way to create an external-only shadow using a CALayer mask with an even-odd path.
Since then I've stopped using it and now use a more flexible approach I worked out. But have never updated the post with that version.
That approach is useful, but is a bit awkward to setup and requires an explicit shadowPath, which doesn't play as nicely with animations.
The new technique is to make the view hierarchy do more of the work, and allow the automatic resizing during relayout handle size and shape changes.
The new approach is to:
- Add content to a
containerView - Add the shadow on a
shadowViewbehind the main content view - Clip only the center of the shadow view.
OuterShadowView
+-- shadowView       // Owns the CALayer shadow and clips it with a clipView
+-- containerView    // Owns the real content and clips it to bounds
Start With the Content
Here is the view we want to draw: a rounded green rectangle over a transparent checkerboard background.
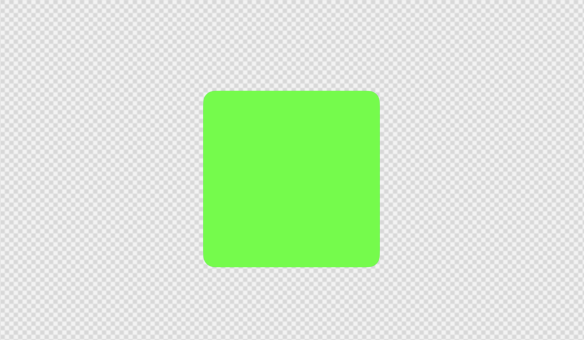
The checkerboard matters because it makes the problem visible. If the content is opaque, a normal shadow hidden behind the view can be good enough. If the content is transparent, translucent, or has holes, the shadow behind the middle of the view shows through.
Add a Normal Shadow
A normal UIView shadow is easy:
view.layer.shadowColor = UIColor.black.cgColor
view.layer.shadowOpacity = 0.5
view.layer.shadowRadius = 24
view.layer.shadowOffset = CGSize(width: 0, height: 8)
That produces the expected outside shadow.
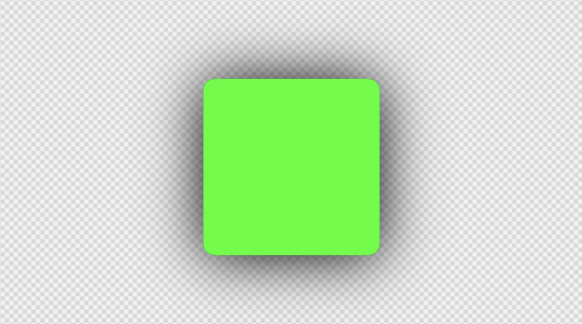
For an opaque green view this looks fine. The issue appears once we want to remove the middle of the view.
The shadow comes from using the content of the view as the template to blur. With no center content there is no shadow generated.
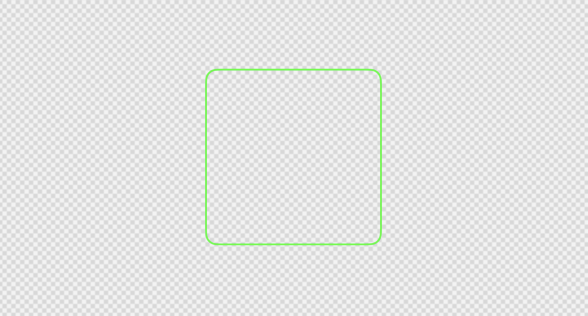
The Middle Shadow Is the Problem
We can fix that by switching to having the shadow on a separate 'shadow view' behind the main content.
The shadow is a blurred version of the view shape, so it exists both outside the bounds and under the center of the content.
What we actually want is only the outside part of that blur. So we are back to the same problem, the center needs to be removed from the shadow.
Keep the Shadow Separate From the Content
The structural change to make the shadow separate from the content is what will allow us to manipulate the shadow without clipping the content itself.
let shadowView = UIView()
let containerView = UIView()

addSubview(shadowView)
addSubview(containerView)
The shadow view is only responsible for the shadow:
shadowView.backgroundColor = UIColor.black
shadowView.layer.cornerRadius = cornerRadius
shadowView.layer.shadowColor = UIColor.black.cgColor
shadowView.layer.shadowOpacity = 0.5
shadowView.layer.shadowRadius = shadowRadius
shadowView.layer.shadowOffset = shadowOffset
The container view is only responsible for the content:
containerView.clipsToBounds = true
containerView.layer.cornerRadius = cornerRadius
containerView.addSubview(contentView)
Now we can fiddle with the shadow view, without effecting the content itself.
Remove the Shadow View's Fill
Now if we just remove the background view shadowView.backgroundColor = UIColor.black we get no shadow.
Because the shadow is just the view's content but blurred. No content, no shadow.
But there are 2 ways to clip a views contents.
.clipsToBounds = trueand.layer.cornerRadius = 2which will clip at the end and round the corners.maskViewwhich allows you to use another views opacity as a mask on another view.
Build a Larger Clip View
Importantly the border counts towards the views opacity, so if we want to mask the shadow, which is 'external' to the view, but not keep the center, then we can create an oversized view, set a border on it of the needed width, and not set an actual main content background color.
This lets the mask be only the external shadow.
In the code OuterShadowView uses a second view, shadowClipView, as the mask for shadowView.
let shadowClipView = UIView()

shadowClipView.layer.borderColor = UIColor.black.cgColor
shadowClipView.layer.borderWidth = shadowPadding
shadowClipView.layer.cornerRadius = cornerRadius + shadowPadding

shadowView.mask = shadowClipView
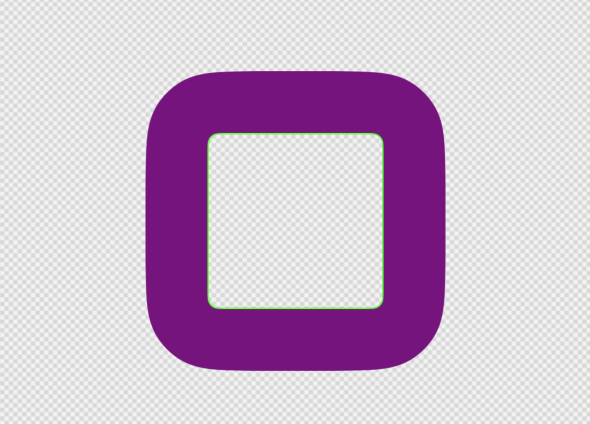
For debugging, the clip view is easier to understand when shown as a visible subview.
In the example below, the red rectangle is the original content bounds and the purple shape is the border width set on the clip view.
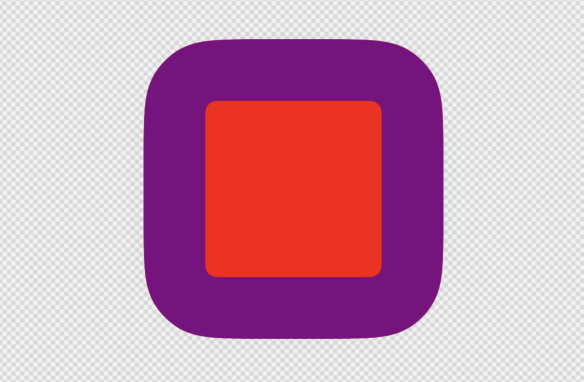
The clip view is larger than the content because the shadow blur extends outside the original bounds.
In practise the shadow is actually not just the 'shadowRadius', but a little beyond it. So the border is (shadowRadius * 1.25), to make sure we don't clip the edge of the shadow.
In layout, the mask is expanded by the border width:
override func layoutSubviews() {
	super.layoutSubviews()

	shadowView.frame = bounds
	containerView.frame = bounds

	shadowClipView.frame = bounds.insetBy(
		dx: -shadowClipView.layer.borderWidth,
		dy: -shadowClipView.layer.borderWidth
	)
}
Use Only the Border as the Mask
As mentioned UIView.mask uses the alpha of the mask view. Opaque parts of the mask keep the masked view visible, and transparent parts hide it (and yes you can use a semi-transparent mask for a fade effect).
So the mask view should only be the layer border, with no background color set.
That border preserves the outside area of the shadow while the transparent center removes the middle of the shadow.
So the shadow itself is still just a normal layer shadow. The only difference is that the shadow layer is only allowed to show through the mask's border region, because of how the mask itself is setup.
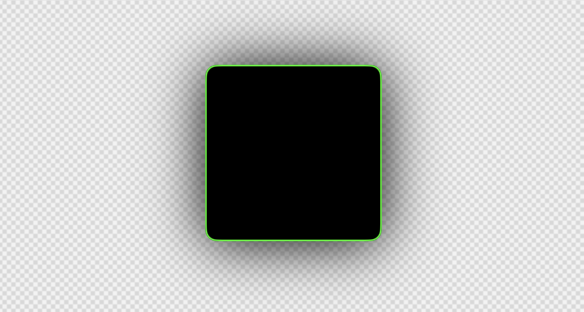
Put the Content Back on Top
Finally, setting the mask clipView as the mask of the shadowView lets us put the real content in containerView, above the now masked shadowView.
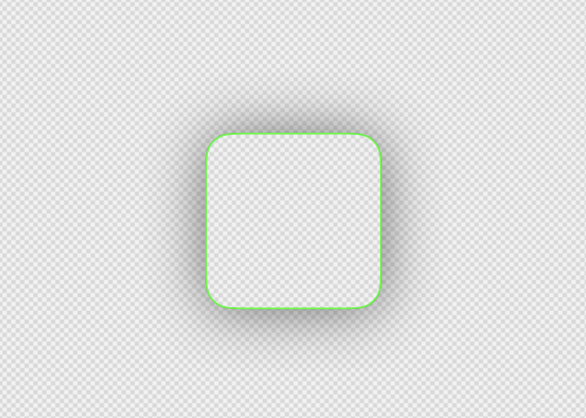
The result is an external-only shadow. The outside blur remains, but the center of the view is clear.
With this structure:
shadowViewdraws the shadow.shadowClipViewremoves the middle of the shadow.containerViewdisplays the real content above the shadow.
The content is never part of the masked layer, so it is not cut out. And maintaining the shadow is all managed by just having the clip view layout slightly larger than the content view.
Complete Version
Here is the core shape of the implementation:
final class OuterShadowView: UIView {

	let shadowView = UIView()
	let shadowClipView = UIView()
	let containerView = UIView()

	var cornerRadius: CGFloat = 0 {
		didSet {
			self.containerView.layer.cornerRadius = self.cornerRadius
			self.shadowView.layer.cornerRadius = self.cornerRadius
			self.shadowClipView.layer.cornerRadius = self.cornerRadius + self.shadowClipView.layer.borderWidth
			self.setNeedsLayout()
		}
	}

	var shadowRadius: CGFloat = 24 {
		didSet {
			let padding = (self.shadowRadius + 8) * 1.95

			self.shadowClipView.layer.borderWidth = padding
			self.shadowClipView.layer.cornerRadius = self.cornerRadius + padding
			self.shadowView.layer.shadowRadius = self.shadowRadius

			self.setNeedsLayout()
		}
	}

	override init(frame: CGRect) {
		super.init(frame: frame)

		self.shadowView.backgroundColor = UIColor.black
		self.shadowView.layer.shadowColor = UIColor.black.cgColor
		self.shadowView.layer.shadowOpacity = 0.5
		self.shadowView.layer.shadowOffset = CGSize(width: 0, height: 8)

		self.shadowClipView.backgroundColor = UIColor.clear
		self.shadowClipView.layer.borderColor = UIColor.black.cgColor

		self.containerView.clipsToBounds = true

		self.addSubview(self.shadowView)
		self.shadowView.mask = self.shadowClipView
		self.addSubview(self.containerView)
	}

	required init?(coder: NSCoder) {
		fatalError("init(coder:) has not been implemented")
	}

	override func layoutSubviews() {
		super.layoutSubviews()

		self.shadowView.frame = self.bounds
		self.containerView.frame = self.bounds

		let padding: CGFloat = -(self.shadowClipView.layer.borderWidth * 1.25)
		self.shadowClipView.frame = self.bounds.insetBy(
			dx: padding,
			dy: padding
		)
	}

}
The padding calculation is not exact. It just needs to be large enough for the shadow radius you are using plus a bit of padding (as the shadow actually goes a bit further than the shadow radius you ask for).
If the border is too thin, the blur will be clipped before the shadow fully fades out.
How This Differs From the Even-Odd Path Version
The earlier article builds a custom mask path:
- Add a large outside rectangle.
- Add the rounded content shape inside it.
- Use the even-odd fill rule to cut the center out.
- Assign that path as the layer mask.
This version uses view hierarchy instead:
- Draw the shadow on a dedicated shadow view.
- Mask that shadow view with the alpha from a larger border-only view.
- Put the real content in a separate clipped container above the shadow.
The visual result is the same. However, the big advantage this one has, is you can clip the container contents to its bounds.
As the old version applied the shadow to the view directly, turning on clipsToBounds should clip the shadow. Now the shadow and content container are separate, so you can clip contents to bounds, and still have an external only shadow.