Creating Cool UI: iOS Shape Morphing
Recreating cool UI demos I've seen online. This time, morphing between different icon shapes and learning about metaballs.
The other day on Twitter I came across a tweet showing a really cool UI demo and wondered how it was done.
Seeing this tweet reminded me of an idea I've had for several years to do a blog post series showing how to actually create various cool UI concept videos, Dribbble posts, or weird UI elements from other apps.
So, as hopefully the first of many, let's see how to a Create Cool UI Component: "Shape Morphing" on iOS.
Metaballs
The technique for organic looking objects morphing between and into each other is known as metaballs.
As two objects get close together, instead of waiting until they start to overlap.
The two objects will instead start stretching towards each other and combining.
iOS Implementation
To implement this effect we need to combine 2 different effects together (at least the way we are going to go about it, there are a few other ways to achieve this effect; which are linked at the bottom of the page).
We need to render our shapes and then apply these effects over the top as post processing steps to the rendered image.
CALayer's do have a .filters property which looks perfect for this!
An array of Core Image filters to apply to the contents of the layer and its sublayers. Animatable
Until you get to the bottom of the documentation.
This property is not supported on layers in iOS
🥲
Sadly such rendering effects aren't supported on iOS.
So instead we'll need to use a rendering API which does let us post-process the rendered result.
On iOS we have the choice of either SpriteKit or SceneKit.
SceneKit has a cool trick of letting you set a UIView as the material of a node, which would be really helpful in applying the trick to UIView's as we could host the views inside the SceneKit view.
However, for now I'll just use SpriteKit as I don't need anything more for this example and it is simpler to work with.
SpriteKit Implementation
First we need to setup our scene:
class SimpleViewController: UIViewController {
// Our SpriteKit Objects
let skView = SKView()
let scene = SKScene()
// The two balls
var blobOne: SKShapeNode? = nil
var blobTwo: SKShapeNode? = nil
override func viewDidLoad() {
super.viewDidLoad()
// Setup Scene
self.scene.scaleMode = .resizeFill
self.scene.physicsWorld.gravity = CGVector(dx: 0, dy: 0)
self.skView.presentScene(self.scene)
self.view.addSubview(self.skView);
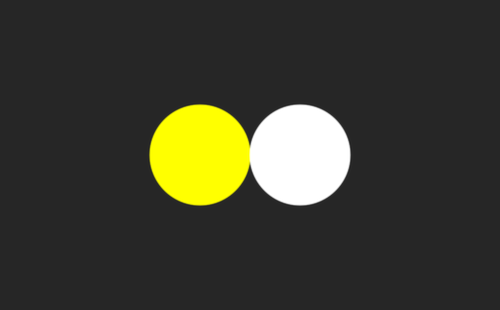
// Create the 2 balls
{
let blob = SKShapeNode(circleOfRadius: 50)
blob.fillColor = UIColor.yellow
blob.strokeColor = blob.fillColor
self.scene.addChild(blob)
self.blobOne = blob
}();
{
let blob = SKShapeNode(circleOfRadius: 50)
blob.fillColor = UIColor.white
blob.strokeColor = blob.fillColor
self.scene.addChild(blob)
self.blobTwo = blob
}();
}
// Set the positions of everything
override func viewDidLayoutSubviews() {
super.viewDidLayoutSubviews()
let bounds = self.view.bounds
self.skView.frame = bounds
let center = CGPoint(x: bounds.midX, y: bounds.midY)
self.blobOne?.position = center.applying(CGAffineTransform(translationX: -50, y: 0))
self.blobTwo?.position = center.applying(CGAffineTransform(translationX: 50, y: 0))
}
}
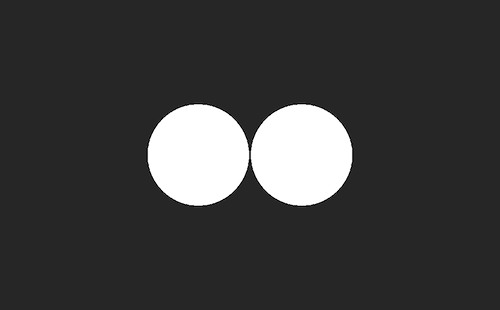
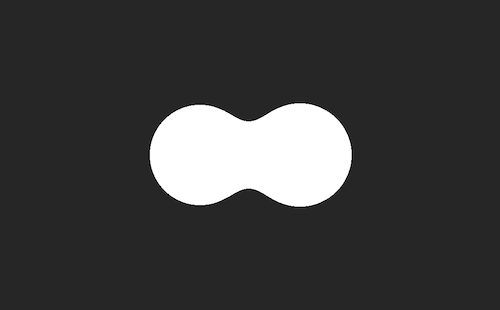
This gives us our basic scene. Two spheres near each other but only just touching.
Now let's add a blur effect at the end of -viewDidLoad().
// - At the top of the file....
import CoreImage
import CoreImage.CIFilterBuiltins

// - At the bottom of viewDidLoad

// Create
let blur = CIFilter.gaussianBlur()
blur.radius = 20
self.scene.filter = blur

// Make sure the scene uses the filter we created
self.scene.shouldEnableEffects = true
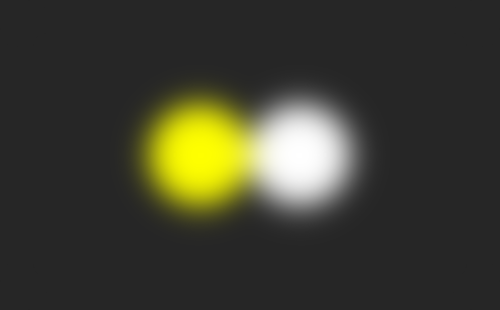
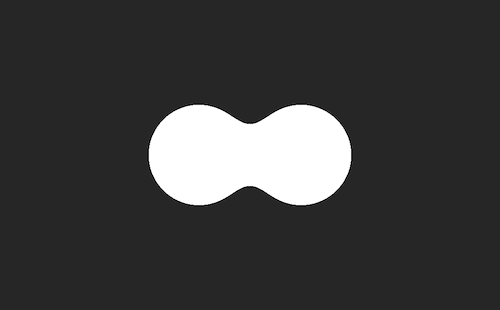
Now that we've done that we can see how the shapes are merged together as their blurs overlap and merge.
However, this still doesn't look like the effect we want. To achieve that we will need to apply a threshold filter where we make fully opaque everything over a certain threshold, and we hide every pixel below that.
This will make sure our shapes still have precise boundaries and appear to merge, not just blur together.
We can't apply multiple filters to the SpriteKit scene, so we'll need to subclass CIFilter and make our own combined filter.
class MetaballEffectFilter: CIFilter
{
	// Internal Filters

	let blurFilter: CIFilter & CIGaussianBlur = {
		let blur = CIFilter.gaussianBlur()
		blur.radius = 30
		return blur
	}()

	let thresholdFilter = LumaThresholdFilter()


	// - CIFilter Subclass Properties

	@objc dynamic var inputImage : CIImage?

	override var outputImage: CIImage!
	{
		guard let inputImage = self.inputImage else
		{
			return nil
		}

		// Blur Image
		self.blurFilter.inputImage = inputImage
		let blurredOutput = self.blurFilter.outputImage

		// Clip to the threshold set
		self.thresholdFilter.inputImage = blurredOutput
		return self.thresholdFilter.outputImage
	}

}
First we blur the image, then clip the output to the threshold.
But where does this LumaThresholdFilter come from? This is another class we'll need to make ourselves.
The easier way to do this is to use Core Image Kernel Language API which is deprecated. Instead you are meant to use the new metal shader CoreImage filter API.
However, to make CoreImage metal shaders requires several more steps of tweaking your build config by adding custom build rules and build settings. So for now I'll show examples of both the metal and CoreImage shaders but will use the Core Image Kernel Language for the rest of the examples afterwards.
Metal Shader
// LumaThreshold.ci.metal

#include <metal_stdlib>
using namespace metal;
#include <CoreImage/CoreImage.h>

extern "C" float4 lumaThreshold(coreimage::sample_t pixelColor, float threshold, coreimage::destination destination)
{
	float3 pixelRGB = pixelColor.rgb;

	float luma = (pixelRGB.r * 0.2126) + (pixelRGB.g * 0.7152) + (pixelRGB.b * 0.0722);

	return (luma > threshold) ? float4(1.0, 1.0, 1.0, 1.0) : float4(0.0, 0.0, 0.0, 0.0);
}
Core Image Kernel Language Shader
// LumaThresholdFilter.swift

class LumaThresholdFilter: CIFilter
{
	var threshold: CGFloat = 0.5

	static let thresholdKernel = CIColorKernel(source:"""
kernel vec4 thresholdFilter(__sample image, float threshold)
{
	float luma = (image.r * 0.2126) + (image.g * 0.7152) + (image.b * 0.0722);
	return (luma > threshold) ? vec4(1.0, 1.0, 1.0, 1.0) : vec4(0.0, 0.0, 0.0, 0.0);
}
""")!

	//

	@objc dynamic var inputImage : CIImage?

	override var outputImage : CIImage!
	{
		guard let inputImage = self.inputImage else
		{
			return nil
		}

		let arguments = [inputImage, Float(self.threshold)] as [Any]

		return Self.thresholdKernel.apply(extent: inputImage.extent, arguments: arguments)
	}

}
This now gives us our final effect:
From Metaballs to Icon Morphing
Now we have our metaballs effect. But we still don't have the same icon morphing as shown in the original Twitter video. However, we now have everything we need.
Now we just need to fade in the new icon over the top of the old icon, while fading the old icon out.
First we need to swap the 2 circles for 1 icon. We'll also need to keep hold of the filter reference this time, so we can animate it.
var currentIcon: SKSpriteNode?

let filter = MetaballEffectFilter()
And let's add some button on screen for us to use.
// Property

lazy var buttons : [UIButton] = { [unowned self] in
	return [
		"circle.fill",
		"heart.fill",
		"star.fill",
		"bell.fill",
		"bookmark.fill",
		"tag.fill",
		"bolt.fill",

		"play.fill",
		"pause.fill",
		"squareshape.fill",
		"key.fill",
		"hexagon.fill",
		"gearshape.fill",
		"car.fill",
	].map({ buttonName in

		var config = UIButton.Configuration.filled()
		config.image = UIImage(systemName: buttonName)
		config.baseBackgroundColor = UIColor.white
		config.baseForegroundColor = UIColor.black

		let button = UIButton(configuration: config)

		button.addAction(UIAction(handler: { [weak self] _ in
			self?.animateIconChange(newIconName: buttonName, duration: 0.5)
		}), for: .touchUpInside)

		return button
	})
}()


// ...in viewDidLoad()

for button in self.buttons {
	self.view.addSubview(button)
}


// .. In viewDidLayoutSubviews()

let buttonSize: CGSize = CGSize(width: 70, height: 50)

var x: CGFloat = 0
var y: CGFloat = bounds.height - (self.view.safeAreaInsets.bottom + 5 + buttonSize.height)

for button in self.buttons {
	button.bounds = CGRect(origin: .zero, size: buttonSize)
	button.center.x = x + (buttonSize.width * 0.5)
	button.center.y = y + (buttonSize.height * 0.5)

	x += buttonSize.width + 5

	if x > bounds.size.width - (buttonSize.width + 5) {
		x = 0
		y -= buttonSize.height + 5
	}
}
Now let's setup showing the icon. (Uses this UIImage helper).
// ...at the end of viewDidLoad()

self.animateIconChange(newIconName: "circle.fill", duration: 0)


// Create new method

func animateIconChange(newIconName: String, duration: CGFloat, showPlayIcon: Bool = false) {
	// Create new icon shape
	let newIconShape: SKSpriteNode? = {
		let iconSize = CGSize(width: 80, height: 80)

		guard let image = UIImage(systemName: newIconName)?.withTintColor(UIColor.white).resized(within: iconSize) else { return nil }

		let texture = SKTexture(image: image)
		let sprite = SKSpriteNode(texture: texture, size: iconSize)
		return sprite
	}()

	newIconShape?.position = CGPoint(
		x: self.view.bounds.midX,
		y: self.view.bounds.midY
	)
	newIconShape?.alpha = 0

	// Add new icon
	if let newIconShape = newIconShape {
		self.scene.addChild(newIconShape)
	}

	let oldIconShape = self.currentIcon
	self.currentIcon = nil

	self.currentIcon = newIconShape


	if duration == 0 {
		newIconShape?.alpha = 1
		oldIconShape?.removeFromParent()
		return
	}

	...
}
Now we have our basic structure.
![]()
To animate the change similarly to how it appears on Twitter we want to do several things in quick succession:
- First animate the blur from 0 to something.
- Halfway through that, start alpha fading in the new shape and out the old shape.
- About 3/4rd way through the shapes fading from one to the other, then animate the blur back down to 0 so by the end you end up left with just the new target shape itself.
	// ... continues

	// Animate the change

	let fadeDuration = (duration * 0.25)

	// Animate in the blur effect
	self.animateBlur(duration: fadeDuration, blur: 5, from: 0)

	// Wait then start fading in the new icon and out the old
	DispatchQueue.main.asyncAfter(deadline: .now() + (fadeDuration * 0.75), execute: {

		let swapDuration = duration * 0.5

		newIconShape?.run(SKAction.fadeAlpha(to: 1, duration: swapDuration))
		oldIconShape?.run(SKAction.fadeAlpha(to: 0, duration: swapDuration))

		// Wait, then start returning the view back to a non-blobby version
		DispatchQueue.main.asyncAfter(deadline: .now() + (swapDuration * 0.75), execute: {

			self.animateBlur(duration: fadeDuration, blur: 0, from: 5)

			// Cleanup
			DispatchQueue.main.asyncAfter(deadline: .now() + fadeDuration, execute: {
				oldIconShape?.removeFromParent()
			})
		})
	})
}

// Helper which animates the blur
func animateBlur(duration: CGFloat, blur targetBlur: CGFloat, from: CGFloat) {
	let blurFade = SKAction.customAction(withDuration: duration, actionBlock: { (node, elapsed) in
		let percent = elapsed / CGFloat(duration)

		let difference = (targetBlur - from)
		let currentBlur = from + (difference * percent)

		self.filter.blurFilter.setValue(currentBlur, forKey: kCIInputRadiusKey)
		self.scene.shouldEnableEffects = true
	})

	self.scene.run(blurFade)
}
As the different parts of the shapes fade in and go over the threshold they appear.
The blur also means the shapes sort of meld together as we sort earlier with the metaballs effect itself.
We basically fade from one icon to the other while animating the metaballs effect on and then back off again.
The result:
You can change the feel of the effect by changing the speed and overlap of different parts of the animation; and how much blur you fade in during the animation.
But I've found those values to look quite nice and match the style of the effect in the original video reasonably well.