Creating Cool UI: Shape Morphing Directly with Metal
Revisiting my raster-based iOS icon morph with an updated Metal morph view
Back in 2022 I wrote the post Creating Cool UI: iOS Shape Morphing about recreating a very cool raster-based icon morphing effect I had seen on Twitter.
The trick is to fade between two icons, blur them together, and then clip the blurred result back into a solid shape. It worked really well!
However, the iOS implementation went through quite a few different frameworks:
UIImage
↓
SKTexture
↓
SKSpriteNode
↓
SpriteKit
↓
Core Image blur
↓
custom threshold filter
↓
screen
SwiftUI's Canvas lets you apply metal effects directly, but if you don't want to use SwiftUI, then you need to jump through more hoops. Of course you could just use Metal directly to do all the steps, but I wasn't used to Metal APIs enough to be comfortable with that back then. As a result of SpriteKit, CoreImage and metal all needing to work together, it wasn't the most efficient approach.
So I wanted to revisit the same effect now and see what it looks like when we render it directly with Metal.
The result:
This version still accepts normal UIImage values, including SF Symbols, but internally it is just two small Metal compute passes. No SpriteKit scene and no Core Image filter graph.
Metaballs Again
First, a quick recap of the actual visual trick used.
Normally, two objects remain completely separate until they overlap:
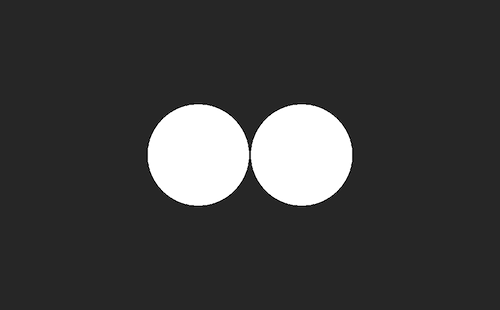
With a metaball effect, the objects begin stretching towards each other as they get close, and merge together:
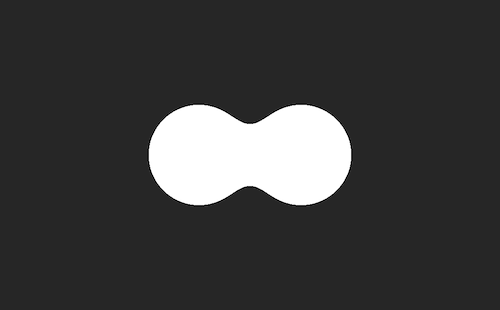
There are several ways to calculate a real metaball surface, but for this UI effect we can fake it with two image operations:
- Blur the shapes so their soft edges flow into each other.
- Apply a threshold so the result becomes solid again.
The blur gives us the connection between nearby shapes, letting them spread out towards one another as they get close:

But obviously we don't want the final icon to look blurry. The threshold solves that by saying that pixels above a chosen value should be visible and pixels below it should disappear entirely:
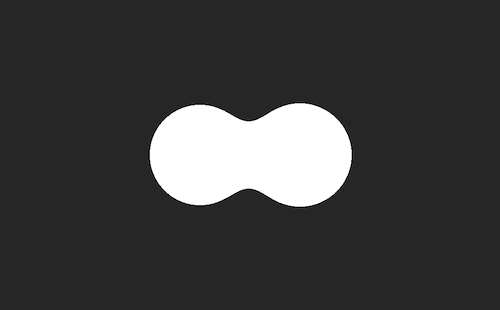
That is the whole effect. Blur, then threshold.
For icon morphing we add one more operation at the start: fade from the old icon to the new icon.
Mix the two icons → blur → threshold
Direct Metal iOS Implementation
In the original version SpriteKit rendered the icons for us, Core Image supplied the Gaussian blur, and a custom Core Image kernel applied the threshold.
This time I do it all in Metal directly:
UIImage
↓
alpha textures
↓
mix
↓
horizontal blur
↓
vertical blur
↓
threshold
↓
screen
The reusable view is available as the MetalIconMorphView Swift Package. You can add it to an app in Xcode with this package URL:
https://github.com/kylehowells/MetalIconMorphView.git
Or add it to another Package.swift:
dependencies: [
   .package(
      url: "https://github.com/kylehowells/MetalIconMorphView.git",
      from: "1.0.0"
   ),
]
The package includes both the Swift view and its Metal shader, so there are no custom build rules to configure in the app using it.
Turning a UIImage into a Metal Texture
The renderer doesn't need the colour channels from the input image. It only needs to know which pixels belong to the icon.
So the first step is to draw the UIImage in white into an 8-bit grayscale bitmap. Transparent pixels become 0, opaque pixels become 255, and the antialiased edge lands somewhere between the two.
let pixelSize = CGSize(
   width: iconSize.width * displayScale,
   height: iconSize.height * displayScale
)

var alphaBytes = [UInt8](
   repeating: 0,
   count: Int(pixelSize.width * pixelSize.height)
)
An important detail is that iconSize is for the UIImage so measured in UIKit points. A CGSize(width: 44, height: 44) means a 44-point icon on every display. UIKit works in screen points, to be resolution independent on high DPI retina screens.
However, metal works on raw pixels. So the view multiplies it by the current screen scale internally when creating the metal texture. As a result, the backing texture will be 44px @1x, 88px @2x, or 132px @3x depending on what device you are running it on.
We then create a grayscale Core Graphics context over those bytes and draw the image into it:
let context = CGContext(
   data: bytes.baseAddress,
   width: width,
   height: height,
   bitsPerComponent: 8,
   bytesPerRow: width,
   space: CGColorSpaceCreateDeviceGray(),
   bitmapInfo: CGImageAlphaInfo.none.rawValue
)!

// Match UIKit's top-left image coordinates.
context.translateBy(x: 0, y: CGFloat(height))
context.scaleBy(x: 1, y: -1)

UIGraphicsPushContext(context)
image.withTintColor(.white, renderingMode: .alwaysOriginal).draw(in: drawRect)
UIGraphicsPopContext()
The coordinate flip is needed when drawing UIKit content into a newly created bitmap context on iOS as well as Mac Catalyst. Without it, the icon texture appears upside down.
Finally we upload those bytes into a single-channel Metal texture:
let descriptor = MTLTextureDescriptor.texture2DDescriptor(
   pixelFormat: .r8Unorm,
   width: width,
   height: height,
   mipmapped: false
)

let texture = device.makeTexture(descriptor: descriptor)!
texture.replace(
   region: MTLRegionMake2D(0, 0, width, height),
   mipmapLevel: 0,
   withBytes: alphaBytes,
   bytesPerRow: width
)
r8Unorm means one normalised 8-bit channel. In the shader, reading a byte from that texture gives us a value between 0.0 and 1.0.
Mixing the Two Icons
Now we have a source icon texture and a destination icon texture.
For each pixel we read the alpha from both textures and mix between them using the animation progress:
float sourceAlpha = source.read(position).r;
float destinationAlpha = destination.read(position).r;

float value = mix(
   sourceAlpha,
   destinationAlpha,
   progress
);
At progress 0 the value comes entirely from the source. At 0.5 it is halfway between both images, and at 1 it comes entirely from the destination.
If we put that value directly on screen, it would just be a normal crossfade. This is the equivalent of fading the two SKSpriteNode objects in the original version.
Now we need to make the two faded shapes melt together.
Adding the Blur
A Gaussian blur looks at the pixels surrounding the current pixel and combines them using a set of weights. Nearby pixels contribute more than pixels farther away.
We could sample a square of pixels around every output pixel, but a Gaussian blur has a useful property: it can be split into one horizontal blur followed by one vertical blur.
Source + destination
        ↓
Horizontal blur
        ↓
Vertical blur
This produces the same result with far fewer texture reads. It also gives us a convenient place to combine the source and destination in the first pass:
for (int offset = -radius; offset <= radius; offset++) {
   uint2 samplePosition = uint2(position.x + offset, position.y);

   float sourceAlpha = source.read(samplePosition).r;
   float destinationAlpha = destination.read(samplePosition).r;

   value += mix(sourceAlpha, destinationAlpha, progress) * weights[abs(offset)];
}
The first horizontal result is stored in a temporary r16Float texture. The second pass walks vertically through that texture to finish the blur.
As an optimisation the Gaussian weights don't recalculate on every frame. The view prepares a set of blur levels when its icon size, screen scale, or maximum blur radius changes, then selects the nearest one while animating.
Making the Shape Solid Again
After the vertical blur we have a soft value for the current pixel. To turn it back into a solid icon shape we apply our threshold:
float alpha = smoothstep(
   threshold - edgeSoftness,
   threshold,
   value
);
A completely hard threshold would make the edge jagged. smoothstep() gives us a very small soft range just below the threshold, preserving antialiasing while the rest of the shape stays solid.
Then we tint the final mask with the view's iconColor and write it straight into the CAMetalDrawable:
float4 color = float4(
   iconColor.rgb * alpha,
   iconColor.a * alpha
);

drawable.write(color, position);
It is important that every part of the animation goes through this threshold. The thresholded output is what makes the whole transition look like one changing shape instead of two images crossfading.
Animating the Effect
We now have everything we need to render one frame. The only remaining question is how much mixing and blur to use over time.
First the linear animation progress is eased:
let easedProgress = progress * progress * (3 - (2 * progress))
Then the blur follows a sine curve:
let blurAmount = sin(easedProgress * .pi)
This starts at zero, reaches maximum blur halfway through the transition, then returns to zero at the destination.
Source icon      Most blobby      Destination icon
progress 0.0  →  progress 0.5  →  progress 1.0
blur     0.0     blur     1.0     blur     0.0
This is the same choreography as the old SpriteKit version—fade between the icons, while bringing the MetaBall effect in and back out — but now the whole frame comes from one progress value directly in metal.
That also means we can display any exact point in the animation. The library exposes this for sliders and interactive gestures:
morphView.display(
	sourceImage: playImage,
	targetImage: pauseImage,
	progress: 0.5
)
Using MetalIconMorphView
With the rendering hidden inside the library, using the finished component is quite small:
import MetalIconMorphView

let morphView: MetalIconMorphView = MetalIconMorphView()
morphView.iconSize = CGSize(width: 44, height: 44)
morphView.maximumBlurRadius = 4
morphView.iconColor = UIColor.label

let playImage: UIImage = UIImage(systemName: "play.fill")!
let pauseImage: UIImage = UIImage(systemName: "pause.fill")!

// Configure the pair, cache both textures, and initially show the play icon.
morphView.display(
	sourceImage: playImage,
	targetImage: pauseImage,
	progress: 0
)

// Later, when the control is tapped:
morphView.animateTo(
	targetImage: pauseImage,
	duration: 0.35
)
Calling display rasterises and caches both images. Setting progress to zero therefore prepares the pair before interaction while also displaying the source icon; there is no separate preload API.
The API deliberately keeps the two images and the position between them explicit. sourceImage, targetImage, and progress continue to describe that pair even after an animation finishes. A completed play-to-pause animation therefore rests at progress == 1, but you can still scrub it back to 0.5 or reverse it by animating to playImage:
morphView.animateTo(
	targetImage: playImage,
	duration: 0.35
)
For a slider or interactive gesture, call display with the exact pair and progress you want:
morphView.display(
	sourceImage: playImage,
	targetImage: pauseImage,
	progress: CGFloat(slider.value)
)
That is an authoritative manual update. It stops any running animation, reports .interrupted to its completion handler, throws away any temporary interruption state, and displays only the requested point between those two images. To continue automatically from a partially scrubbed position, call animateTo with the configured target. The supplied duration always describes the full zero-to-one transition, so beginning at 0.4 uses 60% of that duration.
The view also handles taps arriving during an animation. Asking for the configured source reverses the pair and continues from 1 - progress. If a third icon is selected, the complete on-screen mask is copied into a private texture on the GPU. The old target and new target become the new canonical pair, while the captured mask participates as a temporary third field whose contribution fades to zero. If another interruption arrives, the complete current three-way result is captured again. There is no jump back to either original icon and no GPU texture readback to the CPU.
You can also explicitly replace both sides of the canonical pair without creating a visual jump:
morphView.animateTo(
	sourceImage: heartImage,
	targetImage: starImage,
	duration: 0.35,
	completion: { result in
		switch result {
		case .finished:
			break
		case .interrupted:
			break
		}
	}
)
Most importantly for a small UI control, the internal MTKView is paused when nothing is changing. Calling display or changing the appearance requests one frame. Calling animateTo unpauses it for the duration of the animation, and the final frame pauses it again. It does not sit there continuously producing command buffers while the icon is idle.
The view requests the screen's maximum frame rate while animating. For 120Hz presentation on supported iPhones, the containing app should also set CADisableMinimumFrameDurationOnPhone to YES in its Info.plist.
In a Release-mode Simulator stress test, CPU command encoding took around 0.06–0.07ms per frame and GPU execution around 0.20ms per frame.
The Result
We have ended up with exactly the same basic visual trick as before:
Mix → blur → threshold
The difference is that those operations now happen directly in Metal instead of converting back and forward between different graphics APIs. And the result is packaged as an ordinary UIKit view that can be dropped into another app.
The complete implementation, demo, and installation instructions are available in the MetalIconMorphView library on GitHub.
The original Metaballs example project is also still available if you want to compare the direct Metal version with the earlier SpriteKit and Core Image implementation.